Image
Pinned

Desk Essentials of 2025

This list covers all of my desk essentials going into 2025. From my favorite tools to the must-haves for my desk setup, I’ll be updating this list throughout the year to reflect new additions and upgrades. 

Desk & Monitor

  • Flexispot Standing Desk: I opted for the 48" x 24" size to keep the desk compact. The motorized height adjustment is smooth and reasonably quiet, and the surface gives you plenty of room for all your gear. Link to Product
  • ASUS ROG Strix XG43UQ: I prefer a large 43-inch 4K monitor instead of an ultrawide or multi-monitor setup. It offers the same benefits—spacious screen real estate and multitasking ease—but without the interruptions of bezels or split screens. Its high refresh rate and accurate colors are perfect for productivity, gaming, and content creation. Link to Product

Input Devices

  • Custom Mechanical Keyboard (View Reel):
    • Switches: Gazzew Boba U4T 62g
    • Keycaps: Akko Black on White PBT ASA Profile
    • Case: 60% Walnut Wood Case
    • Plate: Carbon Fiber
    • PCB: BM60 Poker
    • Stabilizers: Durock V2
  • Mouse: My mouse of choice is the Razer Orochi V2. It's compact, lightweight, and versatile. It uses either AA or AAA batteries with a ~950 hour battery life and connectivity via 2.4ghz or Bluetooth, making it perfect for desktop use or travel. Link to Product
  • Stream Deck: This is one of the my favorite tools on my desk and an absolute essential for video editing and desktop control. Elgato's software is easy to use and it’s a time-saver for repetitive tasks or hard to access shortcuts. Link to Product

Audio

  • Shure SM7B: A gold standard for audio quality. Link to Product
  • GoXLR Mini Audio Interface: I bought this in 2019 so it may be a bit outdated. Today, I would try the Elgato Stream Deck + XLR Dock. Link to Product

Lighting & Cable Management

  • Ambient Lighting (Ambibox Module): For a cozy vibe and reduced eye strain, ambient lighting is a must. I use an Ambibox module connected to controller software on my PC. This method offers precise color syncing across the screen, which I find far more reliable than camera-based systems.
  • Monitor Light: I use the SEENDA Monitor Light with wireless controller. I don't believe this is available anymore but here's one from BenQ I would try. I prefer this over a desk lamp since it distributes light evenly across your desk and reduces eye strain.
  • Cable Management: This solution is easily removable to work on your cables. Link to Product

Extras

  • IKEA Desk Mat: A desk mat gives your setup a working area while protecting your desk surface. The IKEA Desk Mat is durable, affordable, and minimalist—perfect for any desk. Link to Product
  • Neewer Microphone Arm: This is a good budget microphone arm that's strong enough to support my Shure SM7B and doesn't have exposed springs. Link to Product
  • IKEA Skadis: This pegboard is perfect for organizing and displaying your tech. I combined two stacked 22"x22" for my setup. Link to Product

My Tips for Building Your Own Setup

Start with your needs. Do you game, edit, or just need to do office work? Prioritize gear that improves your workflow. Budget. You don’t need to go all-in at once. Start with essentials and upgrade as needed.

Affiliate Disclosure

Some links in this guide may be affiliate links. If you make a purchase through them, I may earn a small commission at no additional cost to you. Thank you for supporting my content. 😊
Image

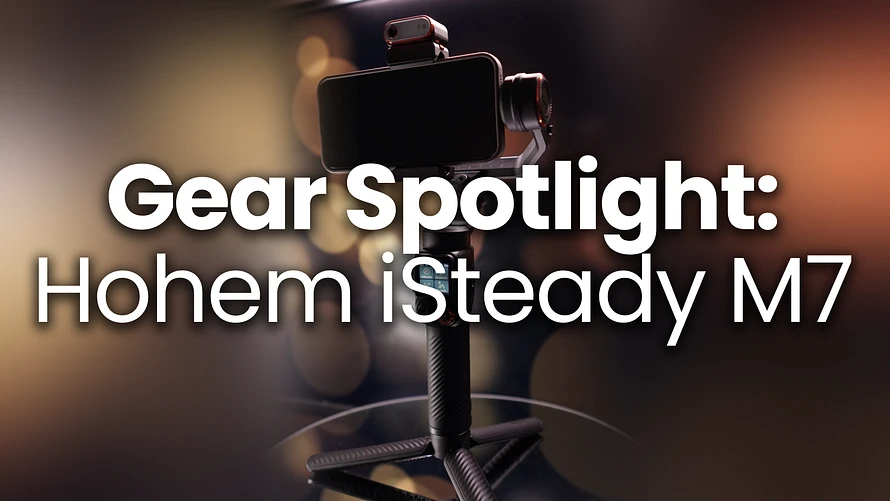
Gear Spotlight: Hohem iSteady M7 - A Feature Packed Smartphone Gimbal

Intro

Shooting smooth video on a smartphone isn’t always easy. Shaky hands, awkward angles, and poor lighting can quickly ruin a good take. That’s where the Hohem iSteady M7 comes in. It’s a compact gimbal that doesn’t just stabilize your shots—it also adds AI tracking, a full-color LED fill light, and even a detachable wireless touchscreen remote. Whether you’re vlogging, live streaming, or just making cinematic clips, the M7 is designed to make mobile filming feel professional without being complicated.

Features & Benefits

Steady and Secure Recording

The iSteady 9.0 stabilization motors are strong enough to handle even larger smartphones, and the tension clip grips your phone tightly so there’s no wobble mid-shot. You can walk, run, or pan across a scene, and your video still comes out smooth.

AI Tracking Without an App

One of the standout features is the AI tracking module. It uses a 2MP sensor and gesture controls to lock onto you—or any subject—without needing a separate app. You can use your phone’s native camera and the module will keep you in frame. For vloggers, flipping the module forward means it doubles as both your tracker and a fill light.

RGB Fill Light

Speaking of light, the module includes a 2W RGB LED with 360 colors and adjustable color temperatures (2700–6500K). It’s perfect for adding mood or just making sure your face looks good on camera.

Detachable Touchscreen Remote

The included 1.4” OLED touchscreen remote connects wirelessly from up to 30 feet away. You can tap to select your subject, control the gimbal, and even preview footage in real-time. It makes tripod setups way more convenient.

Battery & Build

With a 3200mAh battery, the gimbal runs up to 12 hours (8 hours with AI tracking). It can also charge your phone during shoots, which is a lifesaver for longer sessions. The build is lightweight but sturdy, easier to pack than my old Zhiyun Weebil. and it comes with an extension pole built right in for selfie angles or higher perspectives.

Practical Use: How It Feels in Action

Setting up is simple: clip in your phone, power it on, and use a hand gesture to activate AI tracking. I was impressed at how reliable the gesture controls were—it locks on quickly and tracks smoothly, even when moving fast. The gimbal feels balanced in hand and light enough to carry around for long shoots.

For vloggers, flipping the tracking module to face yourself unlocks the best combo: AI tracking plus fill light. Add in the extension pole and tripod, and you’ve basically got a full filming kit in one unit.

I tested it during walkthrough-style filming, and the stabilization was rock solid. The A-to-B point tracking mode also made smooth panning shots effortless—something that usually requires way more setup.

Final Thoughts

The Hohem iSteady M7 is a feature-packed gimbal that makes mobile filming easier, smoother, and more creative. From reliable stabilization to app-free AI tracking, it solves a lot of the pain points of shooting with just your phone.

✅ Perfect for: vloggers, content creators, or anyone who wants smoother smartphone footage without bulky gear.

⚡️ Standout features: detachable remote, RGB fill light, and AI tracking that works straight out of the box.

If you’re looking to level up your phone filming setup, the iSteady M7 is a solid feature packed pick.

Amazon Link

Image

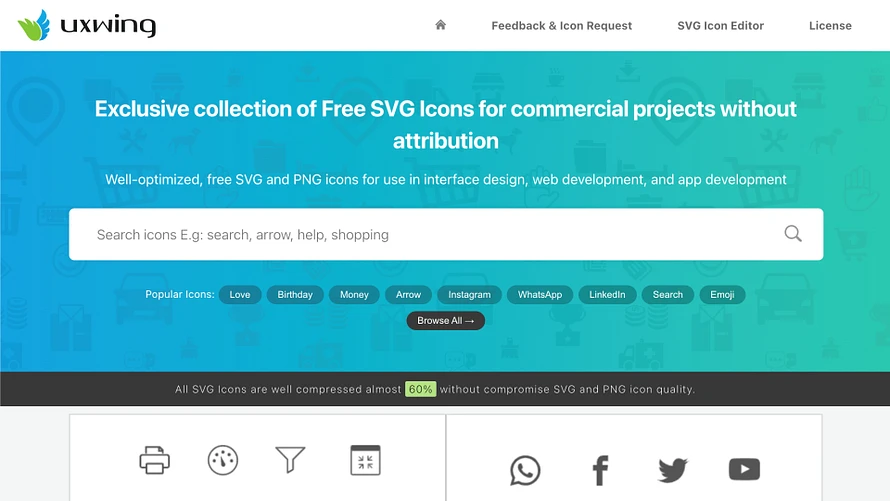
UXWing.com: Free Icons For Design Projects

Whenever I’m designing visual assets, whether it’s for a website, social media post, or any other project, I often find myself searching for the perfect icons to make the design feel polished and professional. UXWing.com has become my go-to resource for this. Their collection of high-quality, versatile icons makes it easy to find exactly what I need, whether I’m looking for social media posts, website elements, or other common design assets. It’s saved me a ton of time and consistently delivers clean, ready-to-use icons that elevate any project.

UXWing Highlights

  • Completely Free & No Attribution — Personal or commercial projects, no worries about crediting. Just don’t resell the files or use them in NFTs.

  • SVG & PNG Files — Lightweight and ideal for websites, apps, presentations, and more. Available in solid, line, and colored styles across 150+ categories.

  • Handcrafted by Designers — Every icon is made with attention to detail, by a small team of graphic designers. 

  • Search or Browse Easily — Find icons for Web, UI, Social Media, Time & Calendar, E-commerce, and more in seconds.

  • Customizable & Requestable — Tweak icons directly in their SVG editor, or suggest new icons and UXWing might just create them for you.

Final Thoughts

UXWing is a great resource for every content creators, designer, and deserves a bookmark. Clean icons, multiple sizing options, and free use in personal or commercial projects without attribution make it a must-have in your toolkit.

Link to UXWing.com

Image

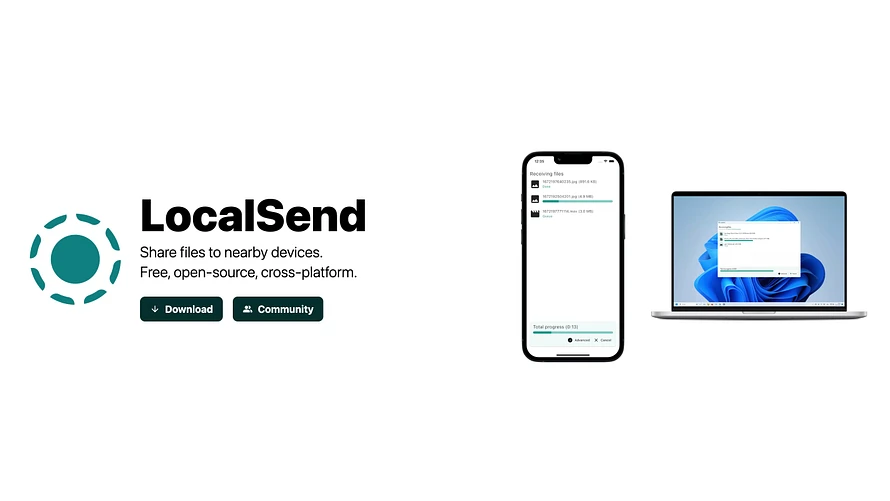
LocalSend: A Free AirDrop Alternative for Any Device

Fast File Transfers = Smoother Workflows

If you’ve ever had to email a file to yourself or search for USB drives, you know the struggle. Transferring files between devices should be easy but most tools are either inconvenient, slow, or tied to the cloud. It’s a free, open-source app that lets you send files instantly over Wi-Fi between any devices—no internet, no cables, and no account needed.

What is LocalSend?

LocalSend is like AirDrop, but without Apple. It works across Windows, macOS, iOS, Android, and even Linux. So, you can finally transfer files between all your devices easily.

All transfers happen over your local network, which means everything stays private, fast, and secure. You don’t need an internet connection, a login, or even Bluetooth. If your devices are on the same Wi-Fi (or hotspot), you’re ready to transfer.

Why It’s Great for Creators

LocalSend is an essential if you:

  • Work across a laptop, phone, and tablet
  • Want to transfer media fast without plugging in
  • Record on your phone and edit on your computer
  • Collaborate with someone nearby and need to share large files easily

I use it often for sending voiceovers or other media from my Windows desktop to my MacBook or iPhone. It also comes in handy when sending files to Android users.

How to Use It

Using LocalSend is ridiculously simple:

  • Download the app on each device (localsend.org)
  • Open the app and it should auto-detect nearby devices
  • Choose your file and hit send
  • Accept the transfer on the receiving device

Final Thoughts

LocalSend is one of those tools that feels too good to be free. It’s simple, cross-platform, and makes my content workflow way smoother.

If you’re tired of using cloud drives for local transfers or just want something that actually works across all your devices, LocalSend is a must download.

🔗 Link to LocalSend

Available for on Android, iOS, Windows, macOS, and Linux

Image

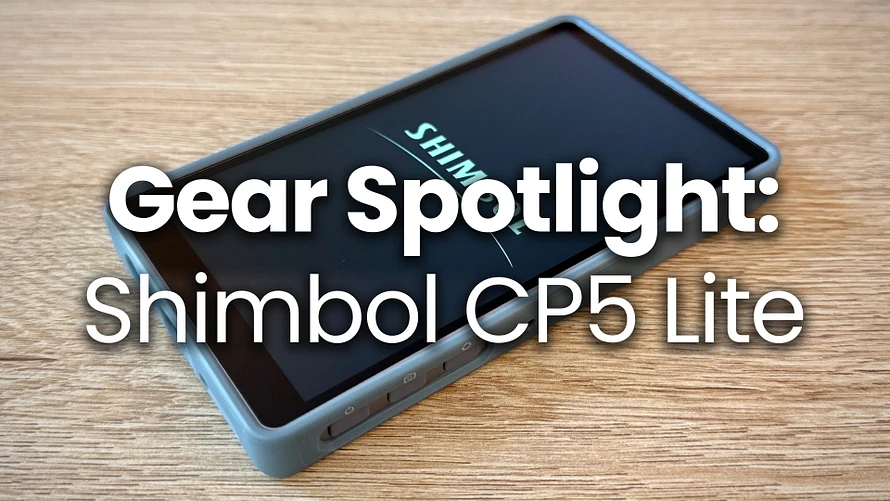
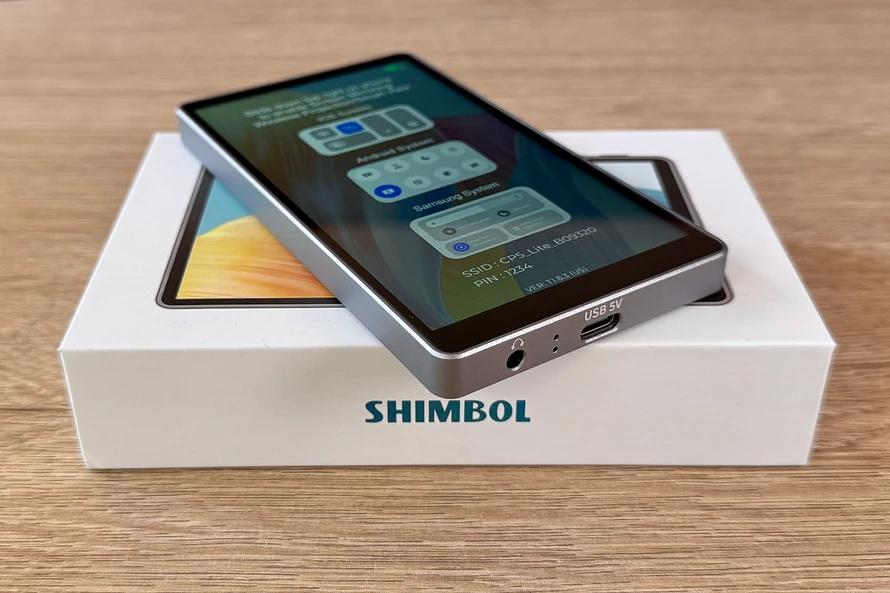
Gear Spotlight: Shimbol CP5 Lite Wireless Video Monitor for Creators

If you’re filming solo or creating content on the go, monitoring your footage can be a real challenge. That’s where the Shimbol CP5 Lite comes in — a compact, wireless monitor that fits in your pocket and makes remote monitoring super easy.

Whether you’re vlogging, shooting product videos, or just want more control over your framing, this tiny monitor has you covered.

One of the biggest standout features is the CP5 Lite’s dual-band Wi-Fi (2.4GHz and 5GHz) connection. It offers screen mirroring with just 40ms of latency, which makes it perfect for real-time monitoring — whether you’re in front of the camera or checking b-roll shots. it works with iPhone, Android, and macOS

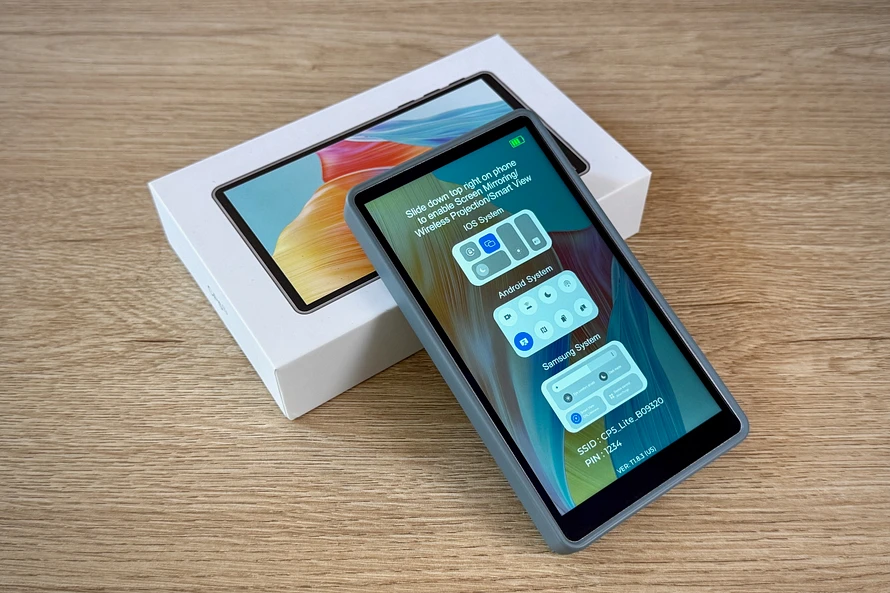
This thing is about the size of a small power bank, weighing just 123g and measuring 4.9 × 2.7 × 0.4 inches. It’s thin, light, and super easy to carry in your gear bag — or even your pocket.

Charging is handled via USB-C, so you can use your standard phone charger. And there’s even a 3.5mm headphone jack for wireless audio monitoring — a rare but super welcome feature these days.

The CP5 Lite includes a magnetic case, so if you’ve got a MagSafe-compatible phone setup, it attaches easily and securely. Setup is dead simple: power it on, and it boots straight to the projection instruction screen. No unnecessary menus or fumbling.

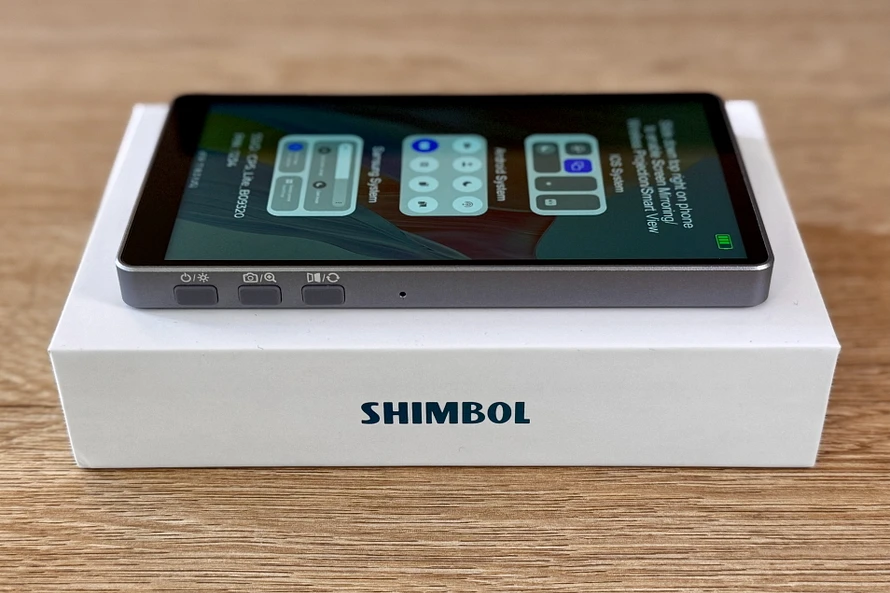
With only three physical buttons, the interface is intuitive:

  • Power/Brightness

  • Camera Shutter/Zoom to Fill

  • Mirror/Rotate

It’s not a touchscreen, but for this purpose, it doesn’t need to be. You turn it on, connect, and shoot.

Here’s something I didn’t expect — it can also double as a secondary monitor for your MacBook or laptop. It’s not its main selling point, but it’s definitely a helpful bonus when you need a bit of extra screen space on the go.

Final Thoughts

If you’re a creator who vlogs, films solo content, or just wants more reliable monitoring without wires or bulky gear, the Shimbol CP5 Lite is a must-have.

It’s compact, easy to use, and works seamlessly with both phones, laptops, and more. The interface is minimal but effective, and it’s priced reasonably for what it offers.

Link to product

Image

OpenAlternative.co: A Resource for Open Source Software

When it comes to software, many creators rely on popular proprietary tools—Photoshop, Notion, and Figma, for example. But as subscription costs rise and privacy concerns grow, more people are turning to open-source alternatives. If you’ve ever searched for a trustworthy, consolidated place to explore these options, OpenAlternative.co is a resource worth bookmarking.

What is Open Alternative?

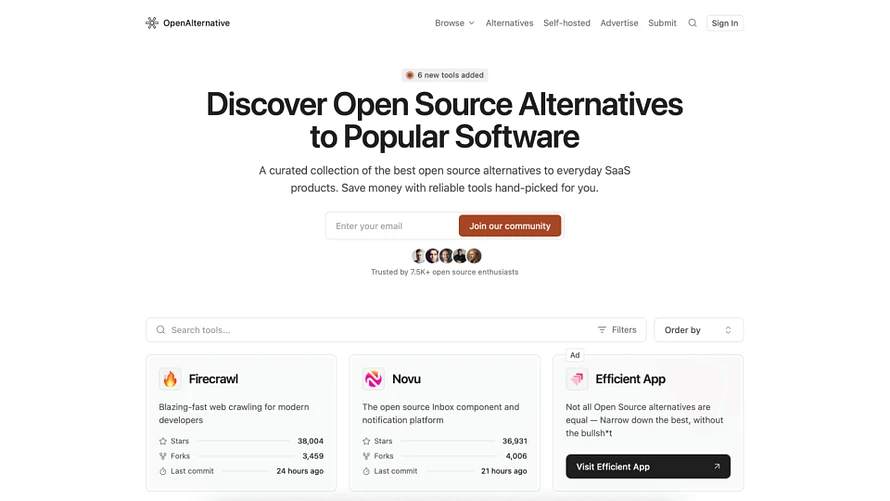
OpenAlternative.co is a curated directory of free and open-source software alternatives to popular mainstream applications. The site focuses on simplicity and usability, helping users discover tools that are often free to use, self-hostable, and transparent about how they handle data.

Each entry on the site includes:

  • The name of the proprietary app
  • Its open-source alternative
  • A short, useful description
  • A direct link to the open-source project

🔍 Key Features & Benefits

  • 🗂 Organized and Easy to Browse
    • The layout is minimal and distraction-free. You can browse the list or search for a specific tool using your browser’s search function. This makes finding alternatives quick and intuitive.
  • 🔓 Focused on Open Source
    • All listed tools are either open-source or built with open-source principles. This means:
      • You can view the source code
      • There are no hidden data collection practices
      • Many tools can be self-hosted, giving users full control
  • 💸 Cost-Effective
    • Most of the tools are entirely free or have a free tier, making this a great option for freelancers, students, small businesses, and creators who want to cut costs without sacrificing functionality.
  • 🔧 Developer-Friendly
    • For developers and tech-savvy users, Open Alternative includes links to GitHub repositories, license info, and community involvement stats.

🧩 Final Thoughts

If you’re looking to reduce software expenses, improve data privacy, or contribute to open-source communities, OpenAlternative.co is a practical and valuable resource. Its straightforward format and curated suggestions make it ideal for both beginners and experienced users exploring open-source solutions.

It’s not a full marketplace or app store, but for discovering viable, often underrated tools—it’s highly effective.

Image

How To: Add Zoom & Motion in Capcut Mobile

CapCut’s motion tools like zoom-ins, pan effects, and keyframes are perfect for giving your edits simple engaging motion. Whether you’re doing a product close-up or dramatic vlog zoom, this guide explains it simply.

Tools & Features In This Guide

  • Keyframes – to set start and end points for your motion
  • Scale & Position controls – to zoom or pan

Manual Zoom & Motion with Keyframes

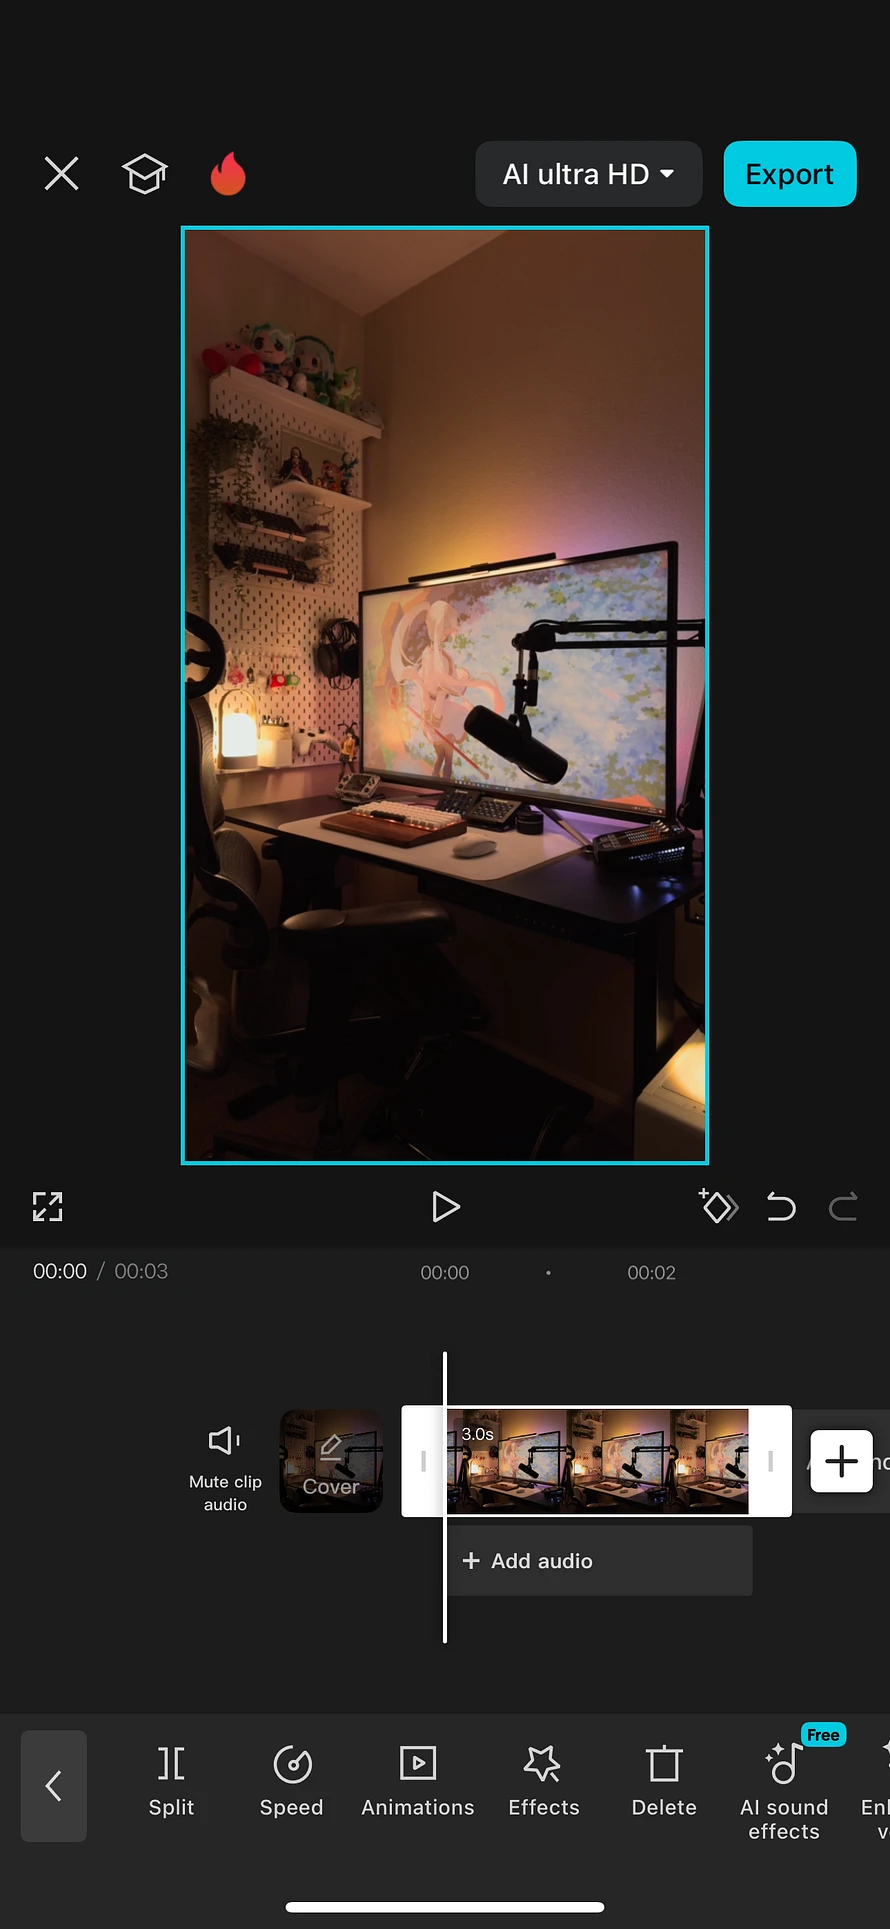
1. Tap the clip you want to add motion to. 

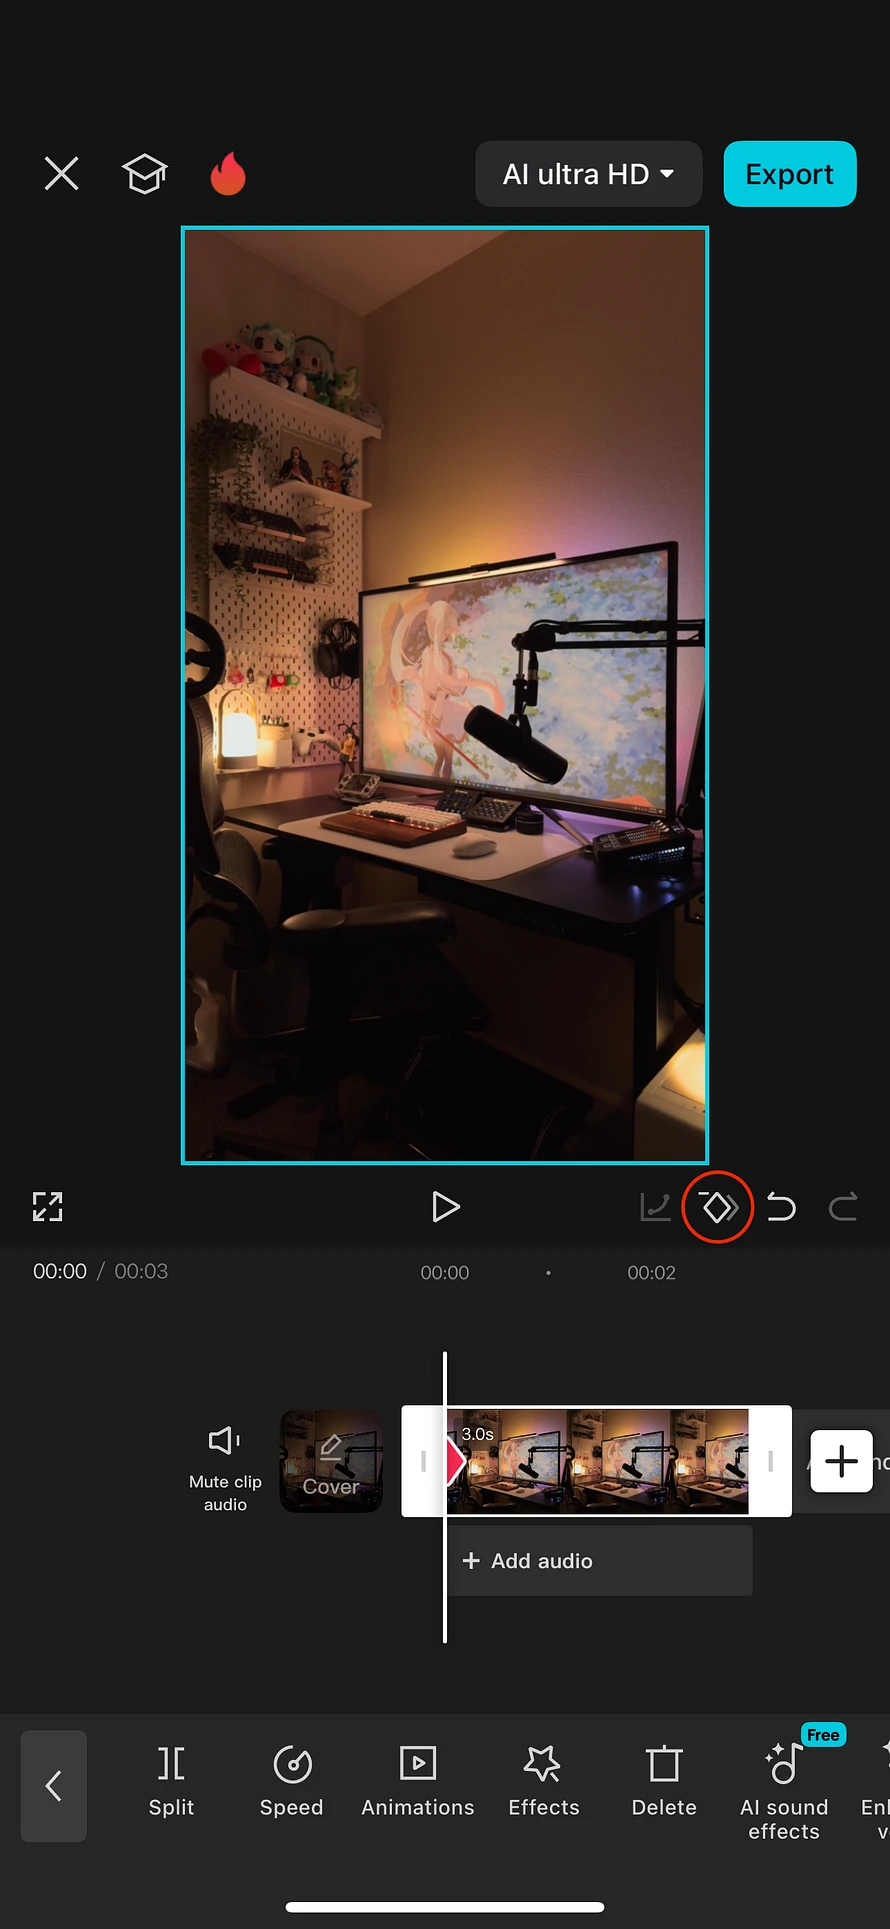
2. Tap the Keyframe icon (diamond) at the spot where you want the motion to start.

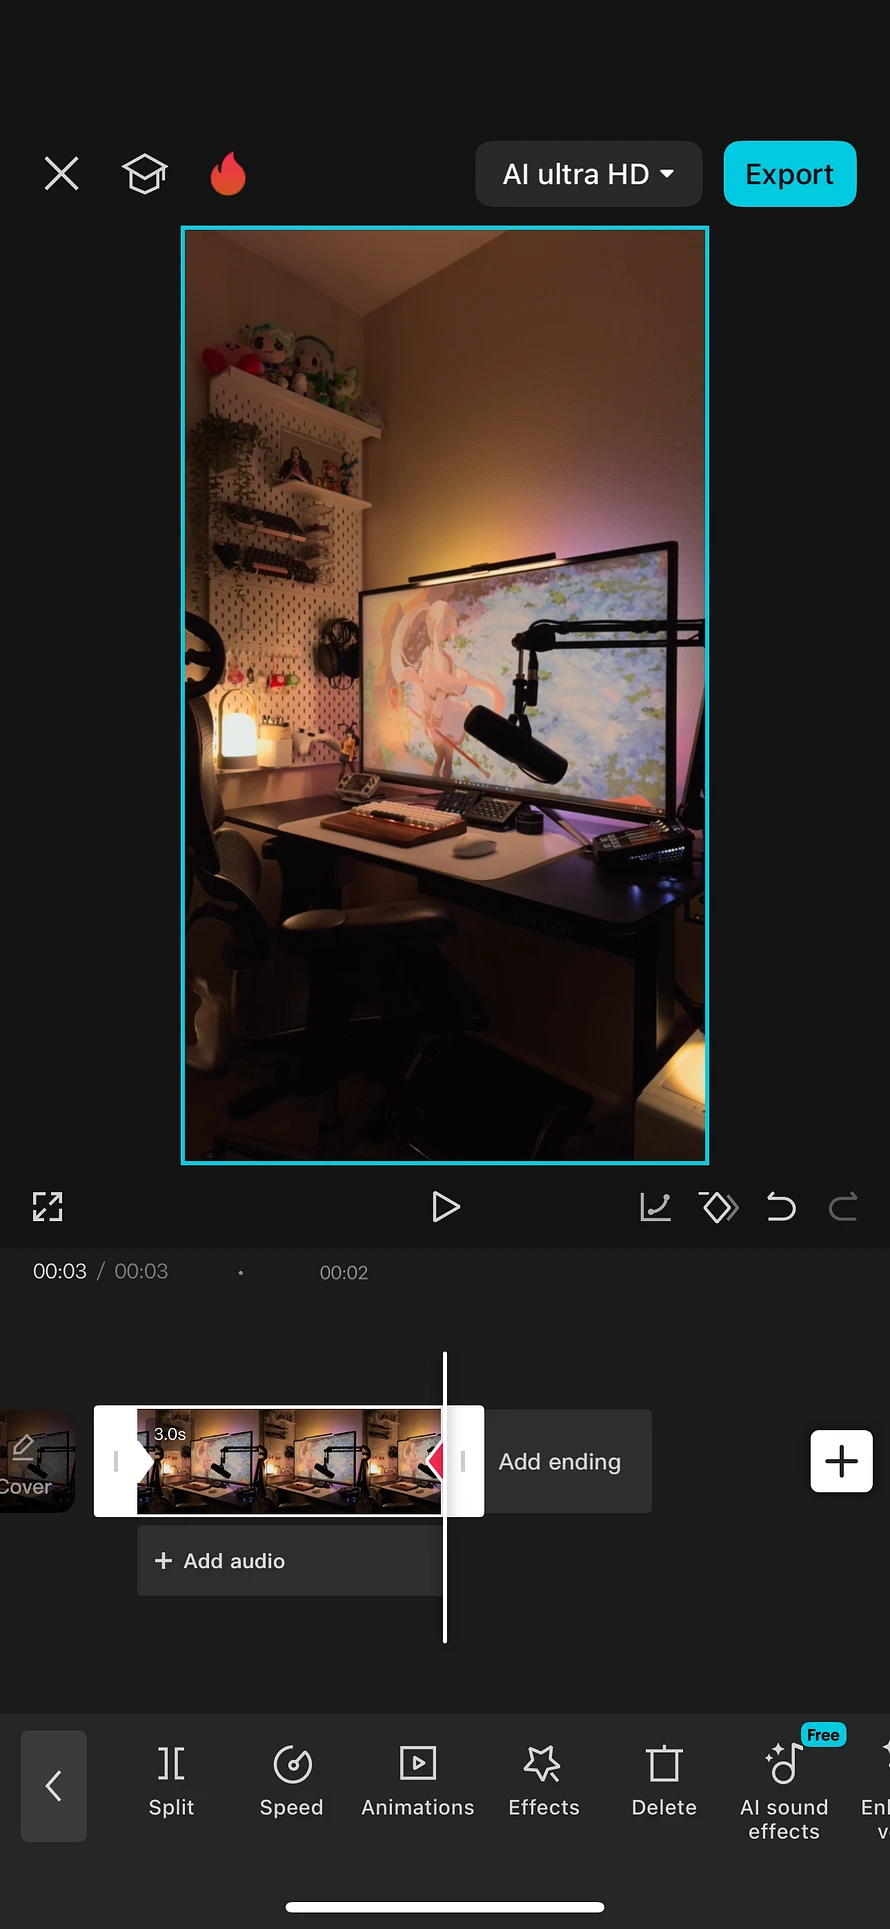
3. Move the playhead to where you want the motion to end, then tap the Keyframe icon again.

4. Now you have two keyframes on your timeline—both using the default zoom and position, no changes.

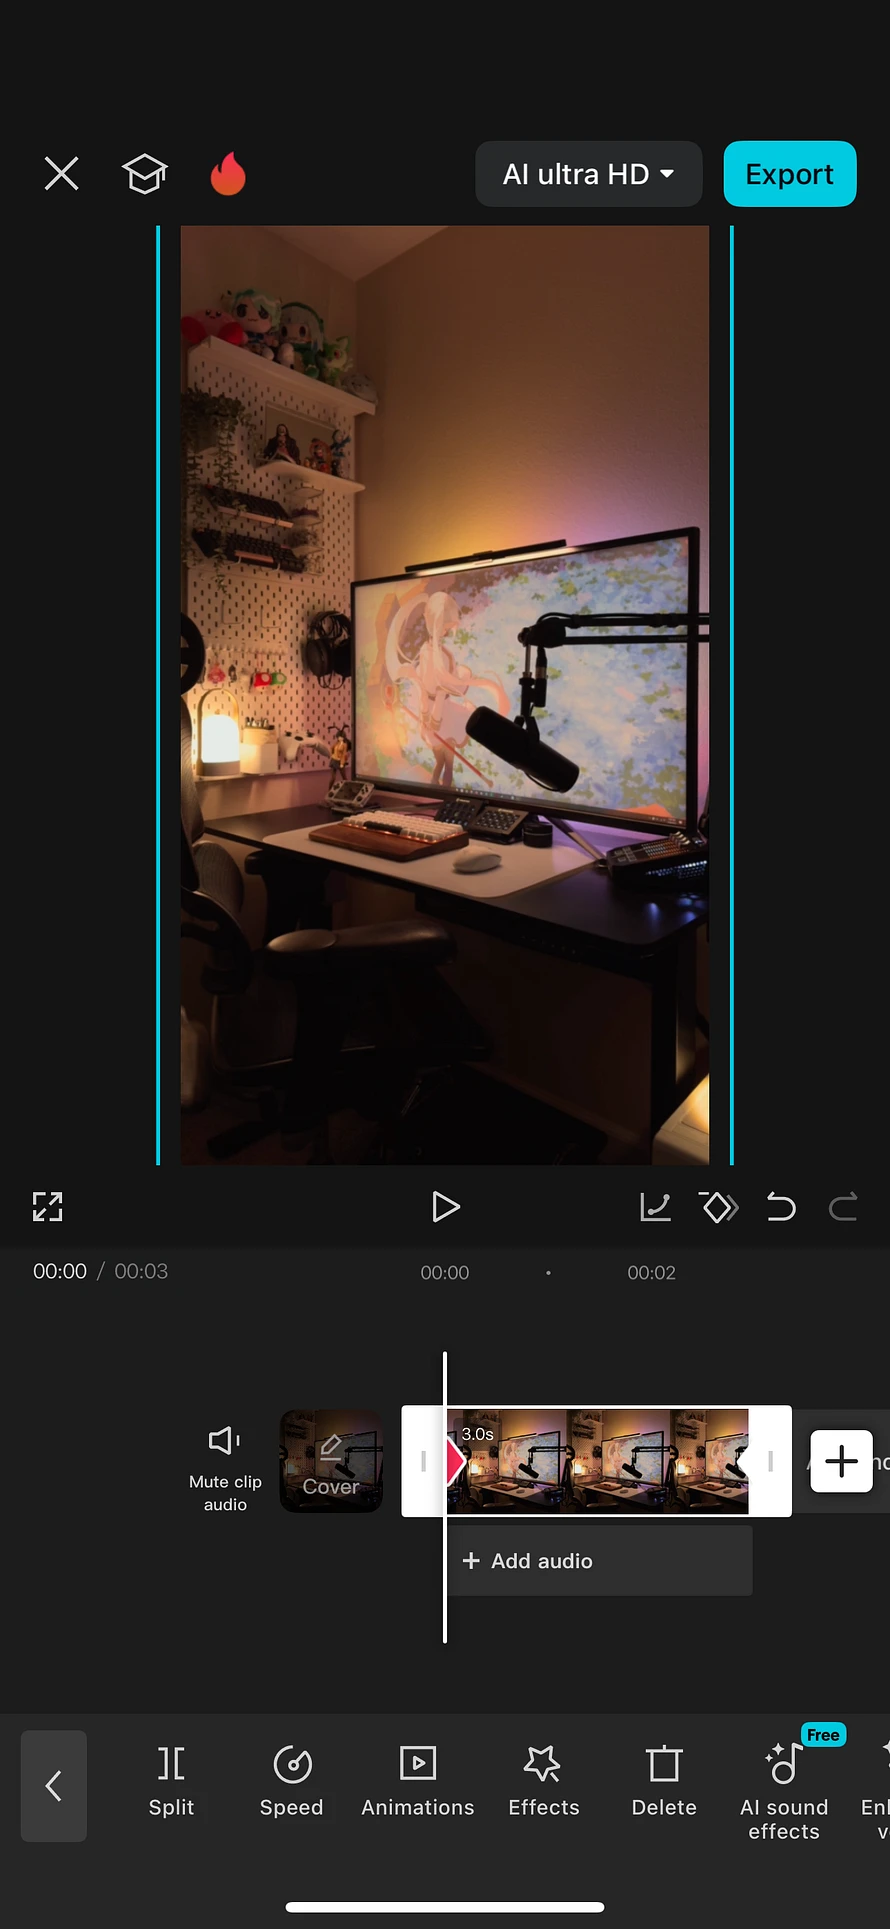
5. Finally, move to the first or last keyframe, adjust the Scale or Position by pinching and moving your video to create your zoom or pan effect.

Final Thoughts

Zooms and motion make your video edits more engaging. CapCut makes it beginner-friendly enough for anyone to create motion. Start simple, experiment with keyframes, and level up your editing!

Image

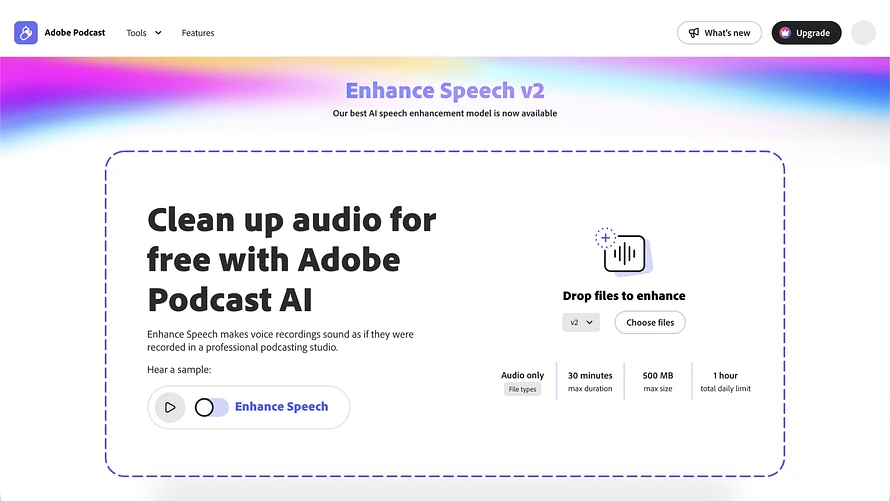
Adobe Podcast: Free AI Audio Tool for Studio-Quality Sound

Clear Audio = Better Content

Clear audio is essential for creating compelling content. Whether you’re recording a video, podcast, or voiceover, bad audio kills good content fast—and your audience will notice.

What is Adobe Podcast?

Adobe Podcast is a free, AI-powered audio enhancement tool. It automatically cleans up your voice recordings—removing background noise, reducing echo, and balancing your levels to make everything sound polished and professional.

Even if you’re recording on your phone in your bedroom, it can still sound like it was recorded in a studio. No mic upgrades, no editing software, and no audio background required.

Why It's Great for Creators

This isn’t just for podcasters—Adobe Podcast is ideal for:

  • Voiceovers for YouTube, TikTok, and Instagram Reels

  • Interviews or remote guest audio

  • Quick cleanups of phone or webcam recordings

  • Saving time on editing while still sounding professional

It’s especially helpful if you’re working solo, on a budget, or just want to simplify your workflow.

How to Use It

Using Adobe Podcast is super simple:

  1. Record your audio (any mic or device works—I’ve used my phone and my MacBook mic)

  2. Go to podcast.adobe.com

  3. Upload your file to the Enhance Speech tool and let it process.

  4. Download your polished, studio-quality audio—ready to drop into your content

Final Thoughts

Adobe Podcast is an awesome tool for creators making quick, short-form content or even longer content—and it’s totally free. Whether you’re just getting started or already an established creator, it’s a useful tool for streamlining your voiceover process.

I’ve used it for my own videos, and the results have really impressed me. Want to hear it in action? Watch my Creator Tool Spotlight on Adobe Podcast!

Image

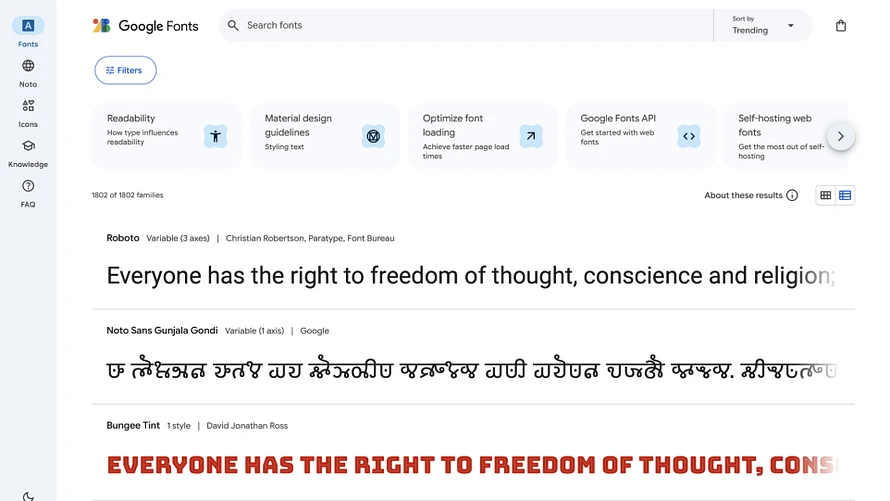
Google Fonts: A Free Font Resource for Creators

From content creation to graphic design and illustration, the right fonts shape the personality of your projects and elevate your work. Google Fonts is one of the best free resources for experimenting with different typefaces and finding the perfect match for your content.

Google Fonts offers a vast library of free, open-source fonts that are easy to browse and integrate into your projects. Plus, all fonts are optimized for web use, ensuring your text looks crisp across various devices and screen sizes.

Preview and Customize with Ease

One of Google Fonts’ most useful features is the ability to preview fonts with your own text. Simply type in a headline, logo name, or paragraph and see how it looks instantly—no downloads required. You can also tweak weight, size, and spacing directly on the site, making font selection hassle-free.

How to Use Google Fonts in Your Projects

Once you find a font you love, Google Fonts makes implementing simple. You can download font files for offline use or embed them directly into your website with a quick link. For video and graphic design, just install the fonts on your computer and start using them in your favorite editing software.

Google Fonts Licensing

One of the biggest advantages of Google Fonts is its open-source licensing. Every font in the library is available under the Open Font License (OFL), meaning you can use them for both personal and commercial projects without restrictions. Whether you’re designing a website, a marketing campaign, or a client project, you won’t have to worry about licensing fees or copyright issues. This makes Google Fonts an excellent choice for businesses, freelancers, and hobbyists.

Final Thoughts

With an extensive library, instant previews, and open licensing, Google Fonts is an essential resource for any creator looking to enhance their typography.

Visit Google Fonts

Image

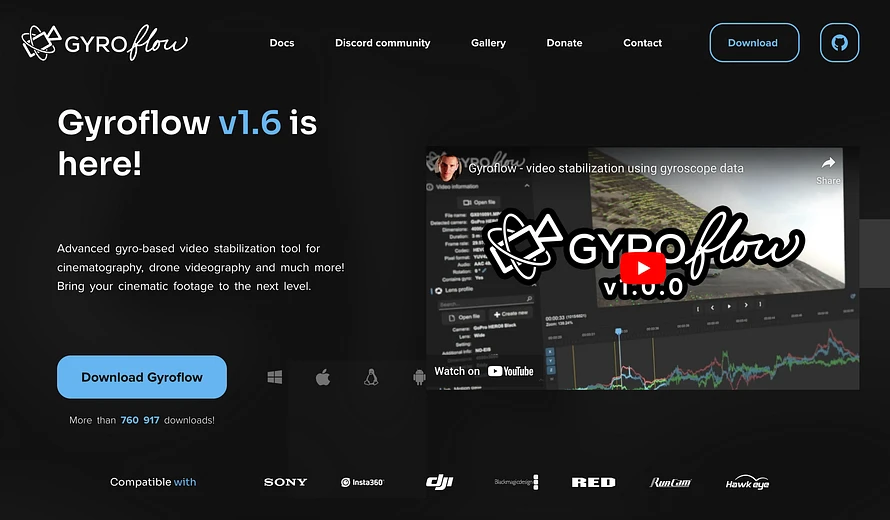
Gyroflow: A Free Tool for Video Stabilization

Gyroflow is a free and powerful stabilization tool with user-submitted profiles and the ability to leverage gyro data for enhanced stabilization with compatible devices.

Why Use Gyroflow for Stabilization?

  1. Tailored Camera Profiles
    1. Gyroflow supports user-submitted camera and lens profiles for cameras with or without gyro data. I tested it with footage from my iPhone 15 Pro Max and found many user-made profiles available.
  2. Enhanced Precision
    1. For devices that have gyro data, Gyroflow leverages that data to provide optimal stabilization that’s often better than built-in stabilization tools in editing apps.
  3. Customizability
    1. Gyroflow gives you full control over stabilization settings, such as crop factor, smoothing intensity, and rotation adjustments. This is ideal for those who have cameras that haven’t had any user-made stabilization profiles made or want to tweak existing profiles

How to Get Started with Gyroflow

  1. Download Gyroflow
    • Visit the Gyroflow website and download the latest version for your operating system. It’s completely free!
  2. Check Camera Compatibility
    • Browse the user-submitted profiles on Gyroflow’s repository or submit your own.
  3. Import Your Footage
  4. Adjust Stabilization Settings
    • Fine-tune settings like stabilization intensity and cropping preferences to get the level of stabilization you want.
  5. Export and Edit
    • Once your footage is stabilized, export it and it’s ready to bring into your editing app!

Link to Gyroflow